Our 2011 Ex BG Caddy Camper Build

Show off your caddy
User avatar
Gabbus95
Caddy2k Groupie
Posts: 37
Joined: Sun Jan 22, 2023 2:50 pm
Engine size/power: 1.6 CR TDI (102bhp)

Re: Our 2011 Ex BG Caddy Camper Build

Post by Gabbus95 »

tippo wrote:Bed looks solid! :)

Which length and width did you go for? Height from floor to top of frame (i.e. height of RHS wheel arch w.r.t. ply floor)?

A bit curious why the bed is pushed forward against the chairs, rather than against the barn doors? Kitchen in the back? :)
Yeah mate it’s sound! So it’s 1.9M long x 1.2M wide (double mattress dimensions)and overall Height of around 310mm making that all but flush with top of wheelarch ( then +100mm thick mattress) And i understand your curiosity as we did consider it that way, i admit bed is a little close and i was actually meant to fit 50mm further back but got carried away in the momentImage plus i am quite a reclined driver, so kitchen unit might of got in the way, even removeing the bulkhead was nice haha. And we decided we didn’t really need a kitchen as we have a Cadac Cooker and we can use the space at the rear as a seat whilst getting changed or something or somewhere to put your feet if you’re sat on the end of the bed plus few other reasons too!


Sent from my iPhone using Tapatalk
tippo
Caddy2k Groupie
Posts: 43
Joined: Thu Oct 07, 2021 11:42 am
Engine size/power: 2.0 TDI (140bhp)
Location: Sweden

Re: Our 2011 Ex BG Caddy Camper Build

Post by tippo »

Ok, thanks!

I went for a bedframe of 1.95 x 1.09 m, which fits precisely width-wise inbetween the arch-covers on a maxi life. In me Mk2 version of the bed the arch-covers will have to go for some extra width. How wide is your Caddy just above the wheel arches?

Cheers
2014 Caddy Maxi Life 2.0 TDI - Stealth Camper
User avatar
Gabbus95
Caddy2k Groupie
Posts: 37
Joined: Sun Jan 22, 2023 2:50 pm
Engine size/power: 1.6 CR TDI (102bhp)

Re: Our 2011 Ex BG Caddy Camper Build

Post by Gabbus95 »


The extra width is nice! And i’m not sure but i can find out for you this weekend. My guess would be, with my current bed width which is 1.2m there is probably around another 200mm to go before it would hit the side.. but i’ll firm up on it for you


Sent from my iPhone using Tapatalk
Last edited by Doc on Thu Aug 10, 2023 7:16 pm, edited 1 time in total.
Reason: Removed unnecessary quote of entire previous post
User avatar
Gabbus95
Caddy2k Groupie
Posts: 37
Joined: Sun Jan 22, 2023 2:50 pm
Engine size/power: 1.6 CR TDI (102bhp)

Re: Our 2011 Ex BG Caddy Camper Build

Post by Gabbus95 »

Started covering side unit, then putting in the switch panel and sockets! Wish i had nailed this instead of using screws.. but another job creation for myself by getting the pine filler out just to take the eye offImage
Image

I also got a 4” thick small double memory foam mattress from The Range, which is suprisingly firm and comfortable for the thickness. We also got some baskets for under the bed.. i don’t mind these and they suit the van, but i think there is room for improvement here!
Image

C-line 240 & USB sockets in, as you may have seen i did have a small circular usb before, but i drilled the hole just a touch too big and i wasn’t happy with the fitment so i changed it for this instead. Excuse the height differenceImageImage
Image


Sent from my iPhone using Tapatalk
Facian
Caddy2k Groupie
Posts: 34
Joined: Wed Aug 16, 2023 11:14 am
Engine size/power: 1.9 TDI (104bhp)

Re: Our 2011 Ex BG Caddy Camper Build

Post by Facian »

That looks like some really good work, is the 110W solar panel up to the job of keeping the leisure battery topped up for light use do you think? Or will the split charge off the engine be doing most of the work and the panel is just to keep a bit of charge in it when the vans not being used as much?
User avatar
the swan fiend
Hyper Poster
Posts: 5154
Joined: Sat Feb 18, 2017 10:52 pm
Engine size/power: 1.6 CR TDI (102bhp)

Re: Our 2011 Ex BG Caddy Camper Build

Post by the swan fiend »

That’s not a van! That’s a luxury apartment!
Well done mate


Sent from my iPhone using Tapatalk
Rescue me from the swans in me
User avatar
Gabbus95
Caddy2k Groupie
Posts: 37
Joined: Sun Jan 22, 2023 2:50 pm
Engine size/power: 1.6 CR TDI (102bhp)

Re: Our 2011 Ex BG Caddy Camper Build

Post by Gabbus95 »

Facian wrote:That looks like some really good work, is the 110W solar panel up to the job of keeping the leisure battery topped up for light use do you think? Or will the split charge off the engine be doing most of the work and the panel is just to keep a bit of charge in it when the vans not being used as much?
Thank you Image i’d say so mate yes, i think this solar is more than enough aswell, but i’d say more so that the split charge/leisure battery is doing the work and then the solar keeps just keeps it topped upImage


Sent from my iPhone using Tapatalk
User avatar
Gabbus95
Caddy2k Groupie
Posts: 37
Joined: Sun Jan 22, 2023 2:50 pm
Engine size/power: 1.6 CR TDI (102bhp)

Re: Our 2011 Ex BG Caddy Camper Build

Post by Gabbus95 »

the swan fiend wrote:That’s not a van! That’s a luxury apartment!
Well done mate Image


Sent from my iPhone using Tapatalk
ImageImage thank youImage


Sent from my iPhone using Tapatalk
User avatar
Gabbus95
Caddy2k Groupie
Posts: 37
Joined: Sun Jan 22, 2023 2:50 pm
Engine size/power: 1.6 CR TDI (102bhp)

Re: Our 2011 Ex BG Caddy Camper Build

Post by Gabbus95 »

Hinged worktop all fitted, quite small access but perfect for the blackout thermal screens for the vanImage
Image
Image

B&M chopping boards in full force on the barn doors..
Image

Plus a little lanyard to open the door fron the inside🤌Image
Image
Image


Sent from my iPhone using Tapatalk
User avatar
Be4ny13
Caddy Fan
Posts: 95
Joined: Thu Dec 01, 2022 9:26 pm
Engine size/power: 1.6 CR TDI (102bhp)

Re: Our 2011 Ex BG Caddy Camper Build

Post by Be4ny13 »

What a great little camper, might be taking the chopping board table idea for my own van! What are the interior spot lights you have fitted, they're exactly what I'm looking for in my van, and how are they wired in?
Far From Perfect, Perfect From Far
User avatar
Gabbus95
Caddy2k Groupie
Posts: 37
Joined: Sun Jan 22, 2023 2:50 pm
Engine size/power: 1.6 CR TDI (102bhp)

Re: Our 2011 Ex BG Caddy Camper Build

Post by Gabbus95 »

Be4ny13 wrote:What a great little camper, might be taking the chopping board table idea for my own van! What are the interior spot lights you have fitted, they're exactly what I'm looking for in my van, and how are they wired in?
Thank you and yeah go for it, very usefulImage
Ebay Item number for the lights: 284907042801
All lights link up to a little box and then a cable that comes out of that, i chopped the plug at the end, extended the cable and wired it into the switch boardImage


Sent from my iPhone using Tapatalk
User avatar
Gabbus95
Caddy2k Groupie
Posts: 37
Joined: Sun Jan 22, 2023 2:50 pm
Engine size/power: 1.6 CR TDI (102bhp)

Re: Our 2011 Ex BG Caddy Camper Build

Post by Gabbus95 »

Been a while! Vans been sweet, we love it, managed to squeeze a dozen nights in it aswellImage
Back on the winter jobs, more so to the exterior this year to freshen it up, but also I will still be doing some small bits on the inside.
I have the list and plan, so first I went for some Mk4 tinted rear lights..

Before
Image

After
Image


Much better, I just need some coding and they are done Image
I’ve also just recieved some side rail covers and a lip spoiler, so as the caddy is in the bodyshop next week getting the passenger sill sorted, it would be rude not to get these done aswell.

Everything else on the van that needs spraying, i’m going to have a go myself, such as bumpers, bonnet, mirrors. And then try sort out the scuffs around the arches, or any imperfections else where, if can!

Keep an eye out, cheers!Image


Sent from my iPhone using Tapatalk
User avatar
Gabbus95
Caddy2k Groupie
Posts: 37
Joined: Sun Jan 22, 2023 2:50 pm
Engine size/power: 1.6 CR TDI (102bhp)

Re: Our 2011 Ex BG Caddy Camper Build

Post by Gabbus95 »

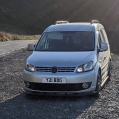
So just over a month later we have made some more progress..
Passenger sill has been sorted along with some colour codes bits, here is a before and afterImage
Before:Image
After:
Image
Looking so much better, should’ve got a closer shot but you get the idea!
And as you may have noticed, I have fitted the side rail covers which are a massive transformation and a tidy little job. I didn’t get the proper rails, I went with 3M 6mm thick number plate sticky pads which I gently heated when applying, which are working good and looking great.

Drivers sideImage

Next I did a mock up fit of the rear spoilers the other week, they have also been colour coded and I am itching to get them on as they also transform the van. My plan is to bond it where I am happy, and then run 2 black OEM Look 4mm self tappers in each from inside the doors into to the spoiler, to pull it in tight and just to make sure these decide to not go for jolly elsewhereImageGot all the bits to do that now, so have no excuse to not get on with it.
Image
So that is this weeks job, but think i’ll need and extra pair of hands and eyes to get it right!

In amongst all this, I’ve been looking at touran seats, especially the V2 ones, i think Image i was going to drive an hour away to get some seats i was semi happy with, but on the day i went with my gut to try the local breakers to see if they had what i really wanted and at a good price.. and they did!
Bagged these 2 for 30 each, although the bases (not pictured) were more at 40 each. But adding all that together and looking at the online prices, i still feel i done well. These were in great condition, they smelt funny and had stains but the wetvax sorted that! Just need to find out if these were heated seats, so i’m gunna go back up to the breakers and see if they were and if so,i may look into get them working. Aswell as feast my eyes on anything else that i may want, such as doorcardsImage
Image
Image

And yesterday I laid some vinyl in, which i know i should’ve done way earlier in the build before i done the bedframe and also knew at the time, but still carries on, it’s not perfect but it is certianly good enough, i’m happy for a forst time!especially having to cut it in.. i’ll work some magic with mastic around the edges to tidy and you wont see 80% of it anyway!Image
Before
Image
After
Image

And that’s where I am currently at, getting ready for summer and making it look pukka!
So fitting spoiler and seats this week.
I’m seriously considering a MK4 rear bumper as i am planning to do spraying soon on bumpers and bonnet anyways when the temps rise abit, but just doing my homework on the bumper..
I also think i’m gunna get the 60mm springs instead of the 40mm that i’m on now, so may order them soon…Image
Long one this!! Anyways should have an update in the week!


Sent from my iPhone using Tapatalk
User avatar
Gabbus95
Caddy2k Groupie
Posts: 37
Joined: Sun Jan 22, 2023 2:50 pm
Engine size/power: 1.6 CR TDI (102bhp)

Re: Our 2011 Ex BG Caddy Camper Build

Post by Gabbus95 »

Got the seats in, well happy with these they look mad! Only downside, the seat height adjuster mechanism on the drivers is broken… so i need a new mechanism but they’re a little pricey and looking online… £120 genuine, aftermaket around £60 and used £30 but with risk of happening again. I’m tempted to pinch the one out of the orignal drivers seat that i took out, providing they are the same.. orginal seats aren’t worth much and probably going to be a long saleImage

But here is the seats!Image
Image

I did go back to the breakers yesterday to get some of the missing seat plastics with the intention to not spend anything.. but ended up getting the touran door cards and a rns310 headunit, all for £50. Unsure if i should’ve got the rns310 though, will have a play atleast but i’m not overly fussed it was a decent price i feel.
So door cards will be job for later on probably, but there will be other bits in the mean timeImage
Until then!


Sent from my iPhone using Tapatalk
User avatar
Gabbus95
Caddy2k Groupie
Posts: 37
Joined: Sun Jan 22, 2023 2:50 pm
Engine size/power: 1.6 CR TDI (102bhp)

Re: Our 2011 Ex BG Caddy Camper Build

Post by Gabbus95 »

Spoiler is on, super happy with the result! Needed itImage
How I did it, firstly I put single sided 2mm foam tape around the under sides of the spoilers, quickly keyed up surfaces, then to apply I used PU Adhesive. Held it with tape where I wanted it, I then drilled 2 holes at 5mm in each barn door from the inside at about 50/60mm in from the ends, angled so the screw wouldn’t come out the other side and then drilled smaller holes (3mm) into the spoilers for the selftapper to bite in… with the screws in, but only by a few turns, i could still make slight adjustments with the spoilers to where i was happy and continue to tighten in.
I will say a 3rd tapper in the middle wouldn’t hurt though, for the extra continuous pull. And an extra pair of eyes and hands if they’re available.

I Used 1” 1/2 x 4mm Black Button Flanged self tappers and Everbuild Puraflex 40 adhesive.

Just need to spray this rear bumper or get a MK4 one nowImage
Image


Sent from my iPhone using Tapatalk
Post Reply